We have one more week until Easter and my little bunnies are buzzing with EGGcitement! Last week I decided to try a couple of different twists on egg dying. First, we had the shaving cream method (read about that here) that wasn't quite what I expected, but still fun! So I tried a second method and made fizzy eggs.
Fizzy eggs are a quick and engaging way to dye your Easter eggs, which makes them toddler-approved. We all know toddlers are not the most patient age group, so a perk of the fizzy egg method is that you don't have to wait for the color to absorb into the egg, it happens immediately. If you are looking for a fun way to color eggs with your toddler, follow along to see my new go-to method for my preschool kiddos.
Fizzy Eggs Set Up
First, gather your materials, you will need:
- Hard-boiled eggs
- Water
- Baking Soda
- Vinegar
- Squeeze bottles or large droppers
- Food coloring
- Ice Trays (optional but helps contain food coloring bottles)
- Plastic Trays
- Egg Holders or large tongs
If you can get outside for this activity, I highly recommend it! To get started setting up I set out plastic trays to set the eggs in. Next, I set out three bowls.
- Hard-boiled eggs
- Water
- Baking Soda
Less is more with this activity, I started with a small amount in each bowl and added as we went. Then I filled up some dollar store squeeze bottles with vinegar, if you have large droppers those would also work. I set out my food coloring and a little teacher tip, I used an ice tray to keep the bottles upright and easily accessible.
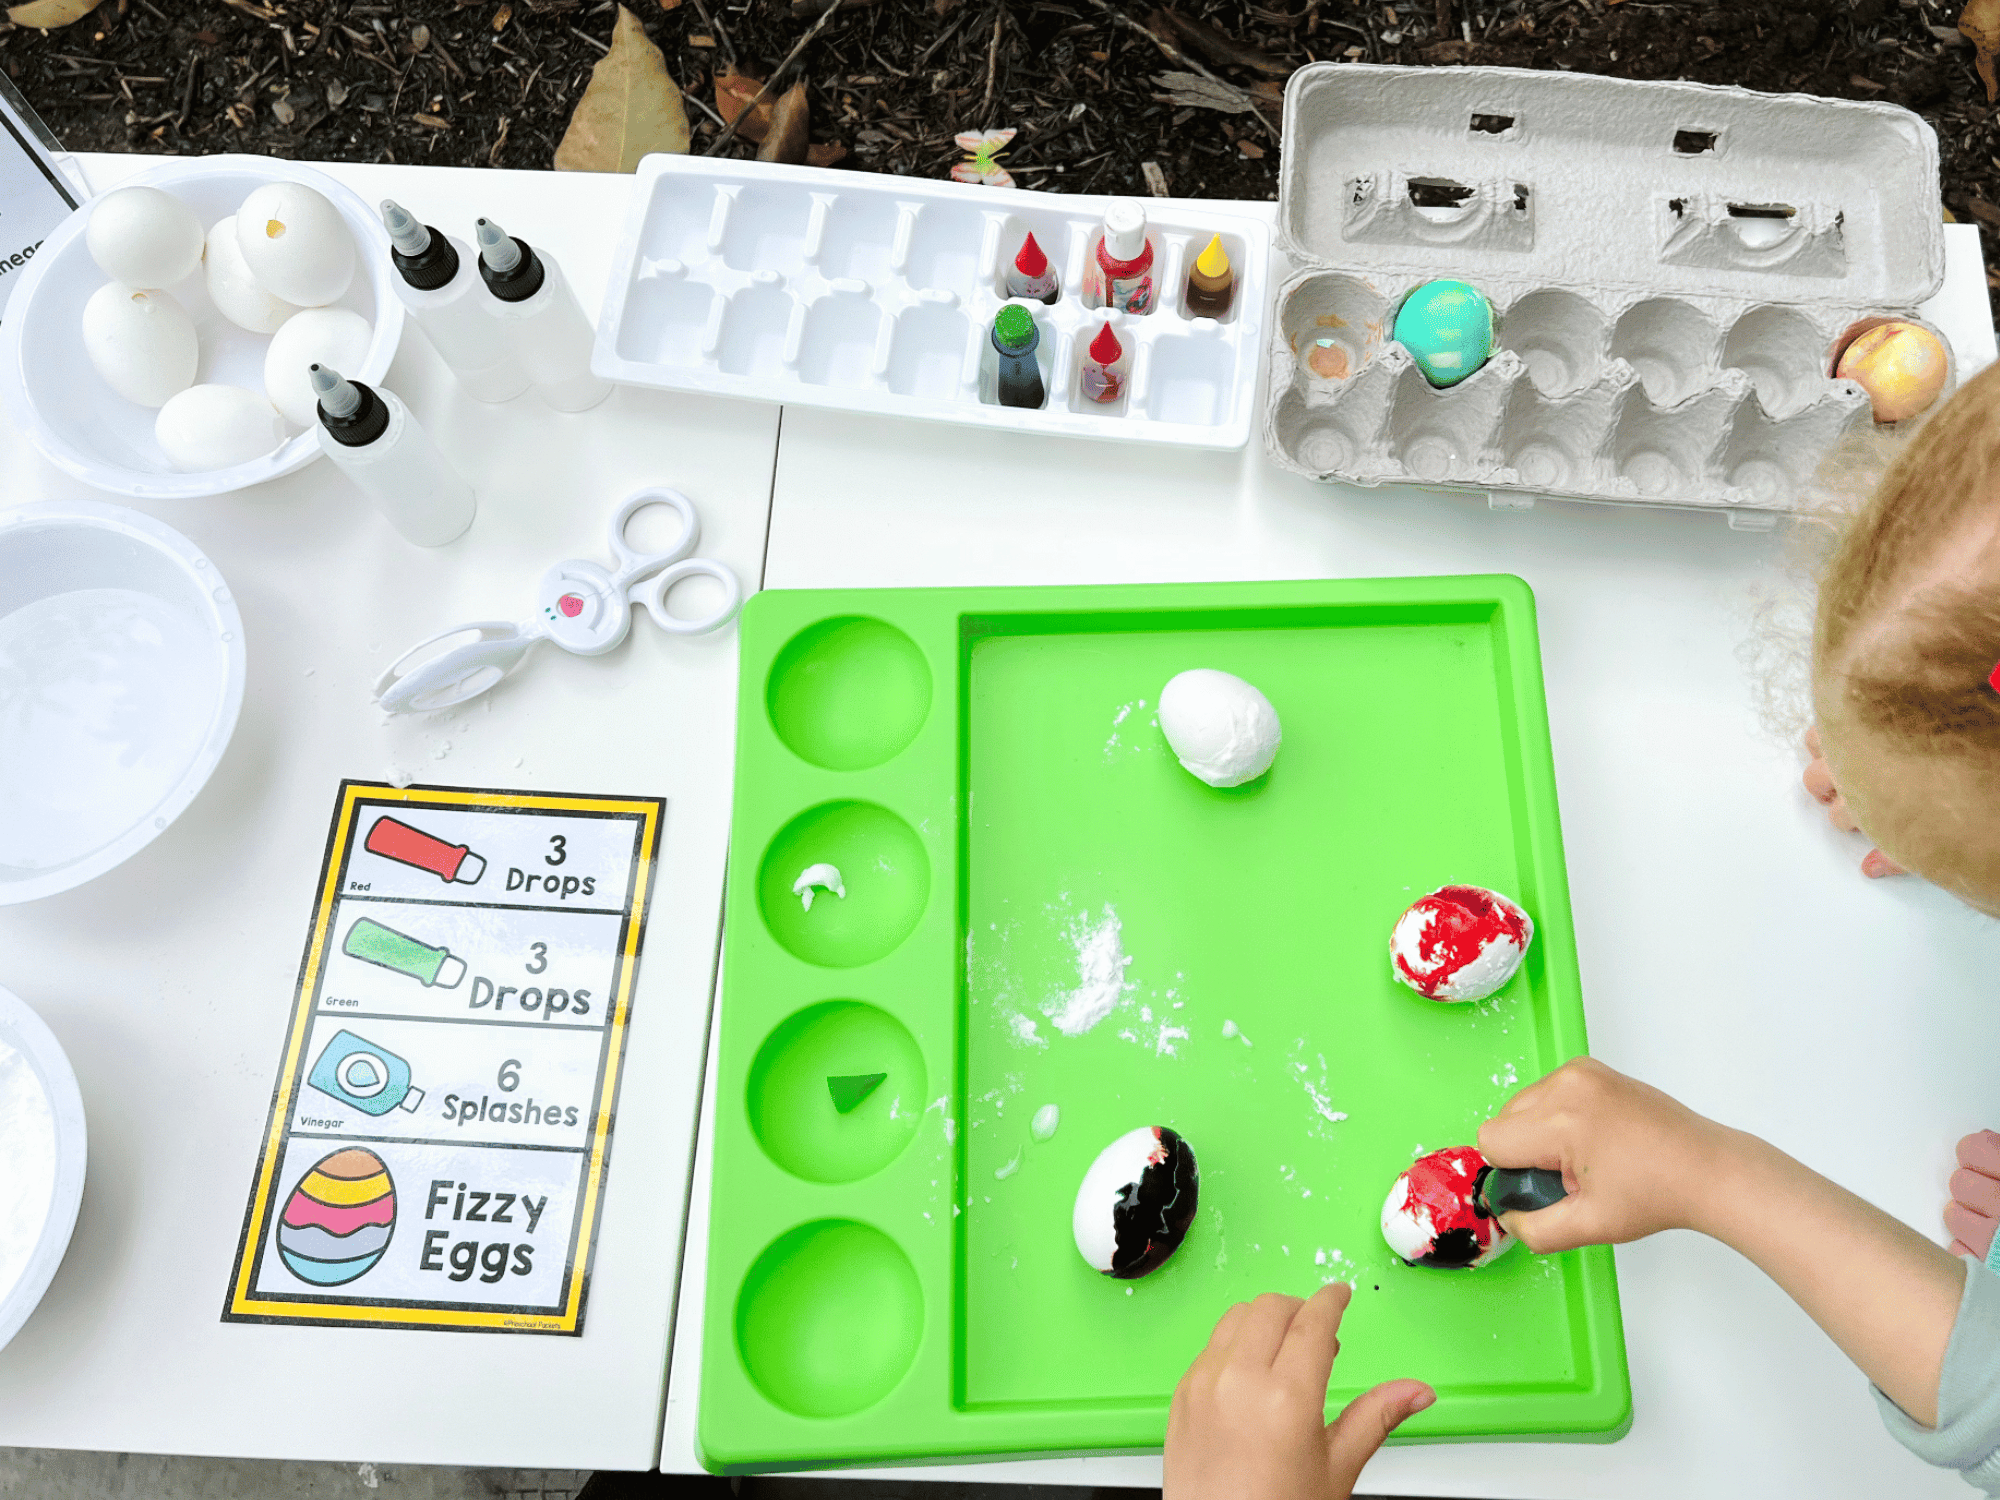
I also printed and laminated my “How to Make Fizzy Eggs” sign and counting cards (more on that later) from my Easter week lesson plans.
Making Fizzy Eggs
The first step for the little ones to follow is picking up their egg with the egg holder or tongs and dipping it in water and then baking soda.
Once their eggs are ready to be dyed, we moved them to the tray where they could add food coloring, and roll them around to get them ready to fizz! My little ones LOVED making fizzy volcanos during our dinosaur week, so I knew this would be a hit.
With the bottles of vinegar, they get to squirt their eggs and watch them react! Not only is this a fun Easter activity, but a science experiment too!
The excitement and joy on their faces were so fun to watch as the eggs bubbled up and the colors changed on the eggs. Once they have dried, the eggs were a beautiful marble pattern and my little scientists were thrilled they got to bring them home to show off.
Extending Fizzy Eggs
Aside from a fun Easter and science activity, you can also extend it into a lesson in counting and following directions. Included with the Fizzy Eggs materials are 12 counting cards that you can print and laminate to accompany your activity.
I used the counting cards with my little ones after prepping the eggs in water and baking soda. Together we chose a card and talked about what colors we were going to need and how many drops and splashes we needed to do. Then followed the directions.
Depending on the age of your kids, they could do this independently or in a group. No matter if you extend this activity or not, you will still have the same result: beautiful Easter eggs and excited little faces!
More Easter Fun
If you are looking for more Easter fun, on the blog I have shared these Easter activities:
Dying Easter Eggs with Shaving Cream: Fail or Success?
Looking for more resources? My Easter Week-themed lesson plan has everything you need for five fun-filled days!









Leave a comment