On the hunt for pumpkin themed activities to keep your preschool learners busy this fall? If so, you've come to the right place. Even though California has not got the memo, it is in fact fall which means it's pumpkin season and I could not be more excited!
This week, we're all about pumpkins. We're going to explore all the parts of the pumpkin with a pumpkin discovery STEM center and talk about how to teach your preschool students about the life cycle of a pumpkin!
Pin It! Don't forget to save this this blog for later! You don't want to forget about the BEST Pumpkin discovery activities for your preK classroom!
Please note that this post contains affiliate links, and if you click through and make a purchase, I may earn a commission at no additional cost to you.
Pumpkin Discovery:
First things first, let's make sure you have all the necessary materials. Print out and laminate all the signs and labels for your Pumpkin Discovery Center in advance. These will help your little explorers understand the various aspects of pumpkins and make the whole experience more organized and enjoyable.
Want the printables? Find everything in my Pumpkin Week Pack
Exploring Parts of a Pumpkin
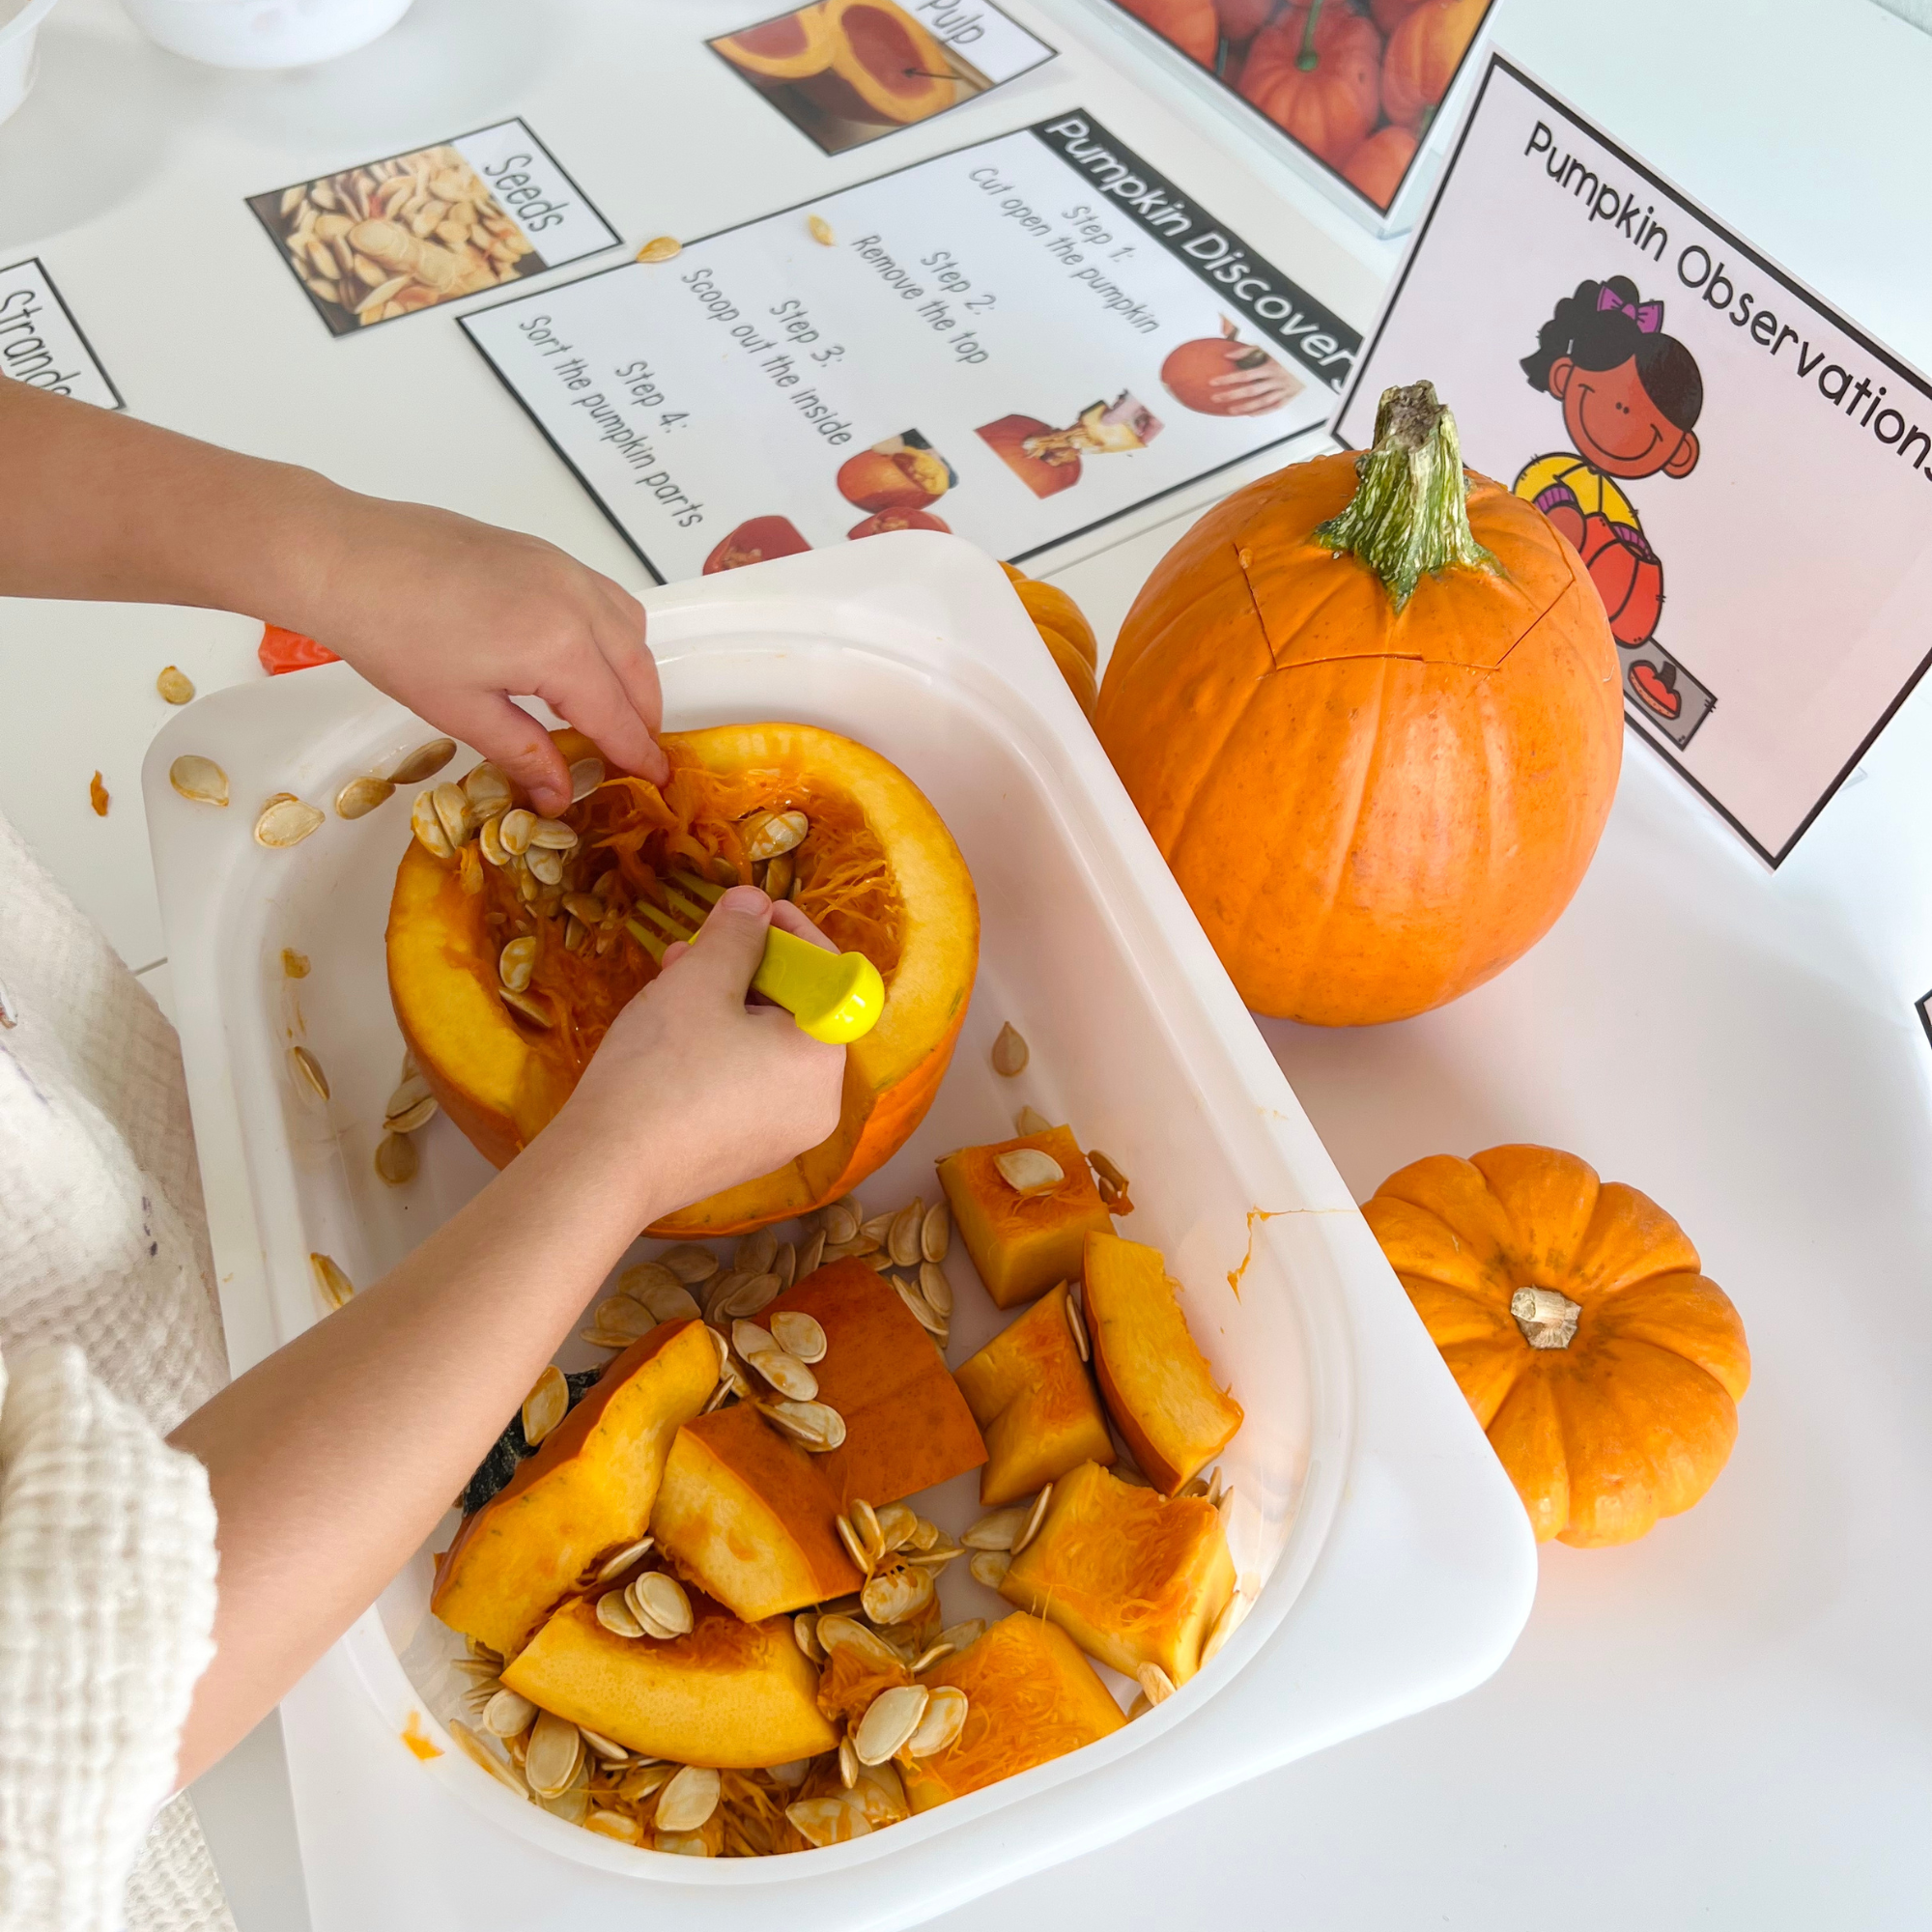
Start by cutting open a pumpkin and placing it in a sensory bin. Be warned this is a messy activity so be ready for a clean up after! Then set out bowls next to the "Parts of a Pumpkin" labels. I stuck the labels to the table by using double sided tape.

I used real world imaged for the pumpkin parts sorting cards so that it creates a hands-on experience that will help my students connect the dots between what they see and what they learn.
Once everything is set out, encourage your kids to sort each part of the pumpkin into the correct bowl. Some of my preschool learners wanted to get messy and use their hands, while others preferred to use forks and spoons to avoid the mess.

The seeds were by far the easiest to sort. But I did need to cut up some of the pumpkin to give them the pulp and the strands since those are harder to simply pick out.
Pumpkin Measuring
Math can be fun when you use it to measure a pumpkin's height and width! I would recommended placing several different sizes of pumpkins for students to measure. My students had so much fun choosing between the large and small pumpkins and measuring each one, the more options the better!
To measure the height of the pumpkin, we used counting cubes. If you don't have counting cubes this is your sign to grab some. I use these counting cubes and we love them!
Once each student picked their pumpkin they colored if the pumpkin they were measuring was short or tall on the recording sheet.
You can find everything in my Pumpkin Week Pack!


Then they stacked the counting cubes to figure out how many cubes tall the pumpkin was. Not only is this an easy math activity, put it is also amazing for working on fine motor skills! The counting cubes can be tricky to snap together for those little hands.
To measure the width of the pumpkin we used linking chains. These are another essential item for preschool. They are great for counting and find motor practice! I use these linking chains.

This was a little more difficult for my students to get the hang of, because they had to learn how to make a line with the linking chains, instead of just putting all the chains together. But once they figured it out they LOVED it! They all had so much fun measuring the pumpkin and counting how many chains they needed.


Don't forget to have matching forms for them to fill out and record their observations! This way they can take their sheets home and talk about what they learned!
You can find everything in my Pumpkin Week Pack!
Pumpkin Sink or Float Challenge
For an easy pumpkin science experiment, set out a clear plastic tub with water. Give each student a small pumpkin. Have them predict whether the pumpkin will sink or float and let them color their choice on a form.
You can find everything in my Pumpkin Week Pack!

Have them predict whether the pumpkin will sink or float and color it on the form. When they drop the pumpkin in the water and record the observation. It's a great way to introduce the concept of buoyancy and prediction, all while having a splash! 
Pumpkin Life Cycle:
Begin by printing the pumpkin life cycle poster. I kept this poster up all week to reference during our activities! These real world images will help kids see what each stage of the pumpkin life cycle looks like.
You can find everything in my Pumpkin Week Pack!
For a more hands-on approach, let students make their own poster to take home! They can add each step of the pumpkin's life cycle to the blank circles. This activity not only reinforces their understanding of the life cycle of a pumpkin but also strengthens those scissor skills!
Want the printables? Find everything in my Pumpkin Week Pack
Pumpkin Life Cycle Crown Craft:
Want something a little cuter? You have to check out this adorable pumpkin life cycle crown! Print the pumpkin crown template and life cycle pieces (available in both black and white and color). Cut out the crown and the life cycle squares, then paste them in the correct order on the crown: Seed, Sprout, Flower, Pumpkin.
To make these crowns wearable, staple the extender strips provided to the crown. My kids loved wearing their pumpkin life cycle crown to show how much they knew about pumpkins!
Now It's Your Turn!
Are you excited to start setting up your own Pumpkin Discovery centers? Don't worry, all of these pumpkin printables that you see are all in one place! And the best part is that this pack also includes crafts, sensory bins and so many more pumpkin activities to keep your preschool learners busy all fall long!









Leave a comment