This year we have done a TON of Halloween themed sensory bins in my preschool classroom. BUT I had to write an entire blog post about this one because it is best of the best when it comes to Halloween sensory bins!
Now before we get too far into this post, I will say this sensory bin is MESSY! Plan to take your sensory table outside if possible and expect for a big mess to clean up after!
Pin It! Don't forget to save this this blog for later! You don't want to forget about the BEST Halloween Sensory bin!

Please note that this post contains affiliate links, and if you click through and make a purchase, I may earn a commission at no additional cost to you.
Material Needed:
These are the materials that I used, but I would suggest going to your local Dollar store to find Halloween themed items you like!

- Sensory Table (I love this Sensory Table on Amazon)
- Jell-O (I used green and orange)
- Monster Fingers
- Mini Jack O Lantern Cauldrons
- Halloween Bottles
- Halloween Mini Erasers
- Googley Eyes
- Spider and Bat Rings
- Child Tweezers
- Toy Syringes
Sensory Bin Prep:
Begin by prepping your Jell-O Sensory bins the night before. Make the Jell-O by following the instructions on the box.
While the Jell-O is still liquid, add in all your Halloween Items and add the bin tub to the fridge to set overnight.

- Orange Jell-O: I added my Halloween mini eraser and Bat/ Spider Rings.
- Green Jell-O: I added googley eyes, monster fingers, and a few extra Halloween goodies.
I love the sensory bins I have because they fit both my IKEA table and my Amazon table. Plus they are so easy clean! They were small enough to fit in my fridge to set the Jello-O plus when we were done, I threw them in the dishwasher for each clean up. You can find the sensory bin set here!

Once your Jell-O is set you can add items to the the top of the Jell-O to make it more inviting for play!
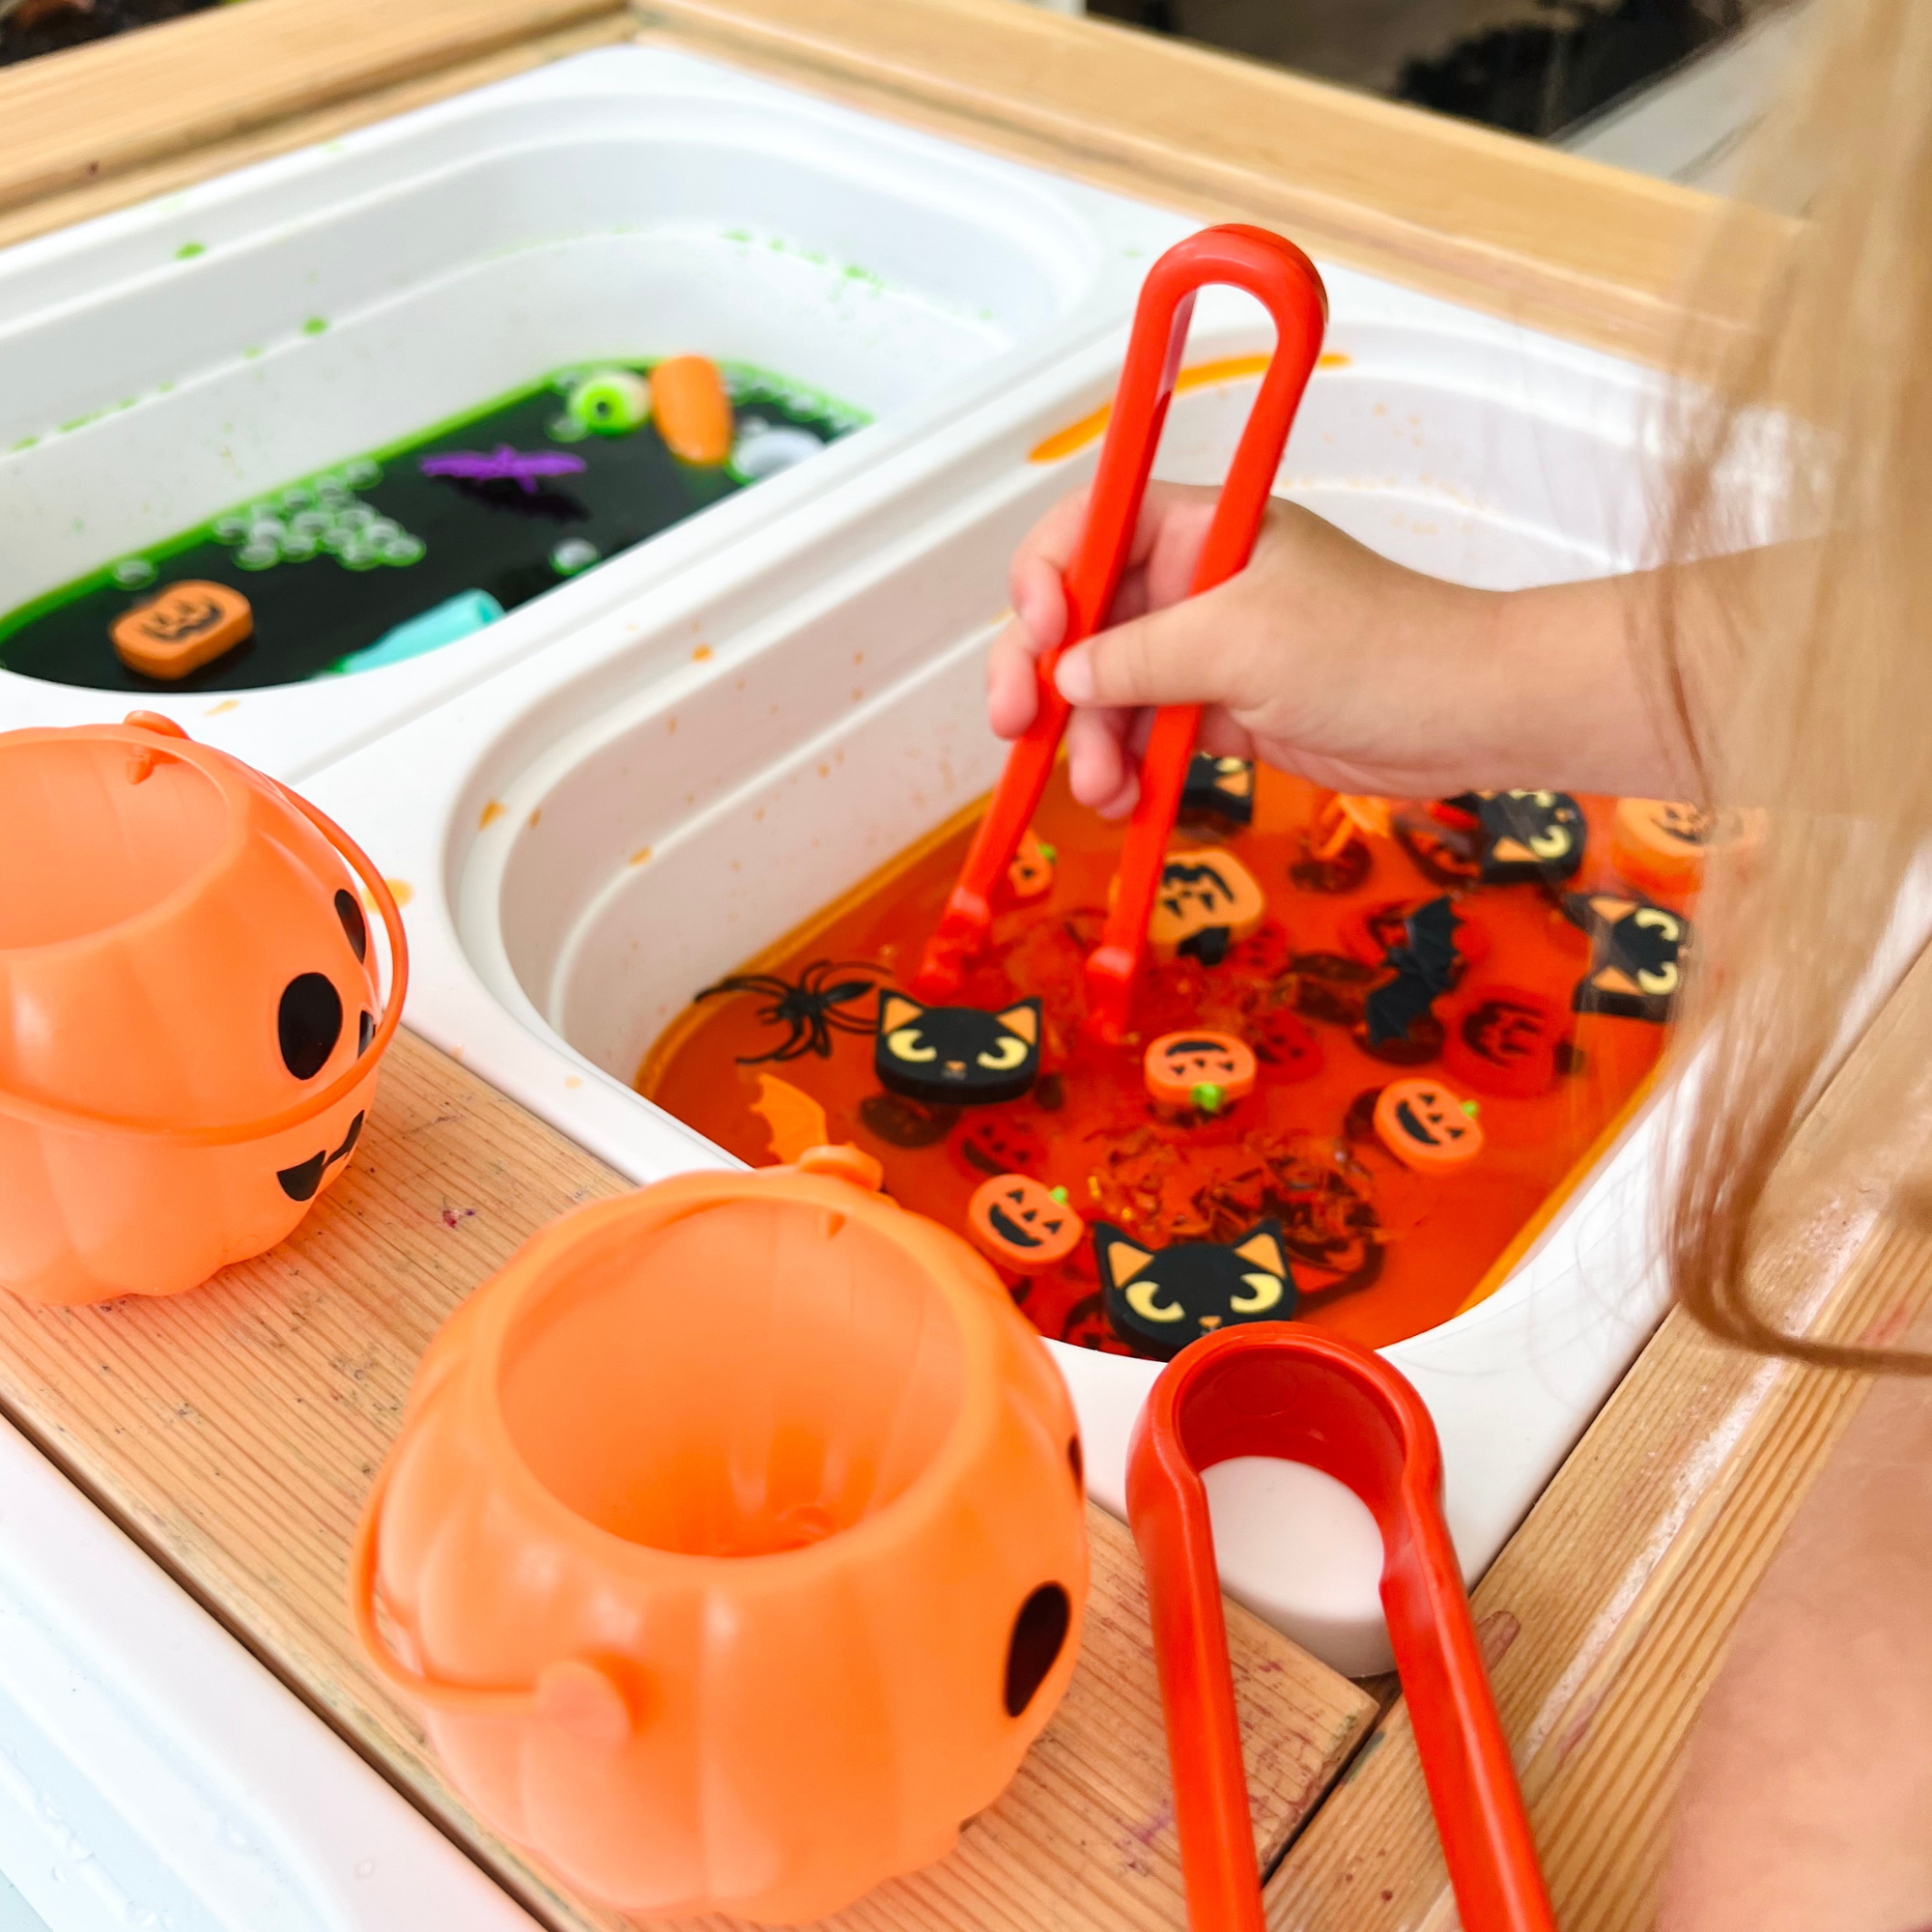
To to the other side of my sensory table I filled a large bin with water and placed by tweezers, bottles and mini cauldrons on the table.

Intentions of the Sensory Bin:
When I set up a sensory table, I always have an intended goal for what skills we are working on. For this sensory table here are the skills being targeted:
- Fine Motor Skills: Using tweezers, monster fingers or hands to pick out each item from the bin.
- Scooping and Pouring Skills: By giving my students the bottles and Jack O Lantern Cauldrons, they will get to fill up both with either the water or Jell-O.
- Communication and Sharing: If you notice there are random amount of each item placed out. This means my students will have to share. Especially since I only have two bottles, they will have to use their words to ask their friends to share with them.
- Sensory Exploration: This is a MESSY and kind of "gross" sensory bin. Some of my students love the texture of Jell-O while others do not. This will expose them to different textures.
🎃 Want more Halloween center ideas? Be sure to check out The Best Halloween Preschool Blog post for more fun activities!
Tips for Play Sensory Play:

Tip #1: Let the kids play at their pace
When I first set this sensory bin out, it probably took a solid 5-10 minutes for them to start touching the Jell-O with their hands. They thought it was "yucky" but SO SILLY!
Most of my students came up to the sensory bin, used the tweezers to pick out an item and chose to wash it in the water to clean it off. They were so careful at first, but that didn't last for long!

As they got more comfortable with touching the sensory bin, that's when the creativity began to flow! They began to mix up magic potions, scooping with their hands and really began to play with the sensory bin!

But the reason all my kids had so much fun with it because I did not force play. I allowed them to have the time they needed to get comfortable playing with a messy sensory bin. Some of my students still have sensory issues as we are working on that together. But even those students loved this because they got to choose how much they actually touched the sensory bin - Yay for child tweezers!!!
Tip #2: Add in items slowly
If you notice from the first picture, not all the items were added to this sensory bin at first. I waited to add most of the monster fingers and the toy syringes until they were already playing.


I usually keep one or two items in my pocket for when they need a little more guidance during play. I noticed that most of the kids were ditching the child tweezers and only using their hands, so I gave each child enough monster fingers to create a full monster hand. This reinforced that fine motor development that I was wanting to work on with this sensory bin.
🎃 Want more Halloween center ideas? Be sure to check out The Best Halloween Preschool Blog post for more fun activities!

When I noticed that they were enjoying playing with the water more, I gave my students the toy syringes. This extended our play time by probably another 20 minutes!


Tip #3: Let them get MESSY!
I am sure you have already realized that if you do this sensory bin, it is going to get messy. But I want to encourage you to let this Halloween themed sensory table to get as messy as the littles want it to be! While we do keep to our sensory bin rules such as keeping everything in the sensory bin, I am not worried it if it gets on their clothes or the floor. It's messy and that's ok!
Plus thats why I love these these sensory bins because I'm able to pop them in the dishwasher for easy clean up!

More Halloween Preschool Ideas
Whether you need more sensory bin ideas (I promise they aren't all this messy!), crafts or learning centers, I combined all my favorite Halloween themed preschool activities all in one blog post!
🎃 Head to The Best Halloween Preschool blog post for everything you need to get prepped for spooky themed centers!







Leave a comment